“We want kids to be able to apply what they learnt in Scratch to something really fun that challenges their creativity and at the same time, has real-life applications. In this course, their creativity really is the limit.”
One step at a time.
That’s usually the answer when we need to deal with big problems. Let’s tackle things one step at a time.
In this case (or course) let’s take it one straw at a time!
Presenting our latest launch designed for kids 7-13 years old; introduce your kids to the world of robotics, hardware, and engineering in a fun and hands-on environment. Construct structures using Strawbees and then program it with a Quirkbot!
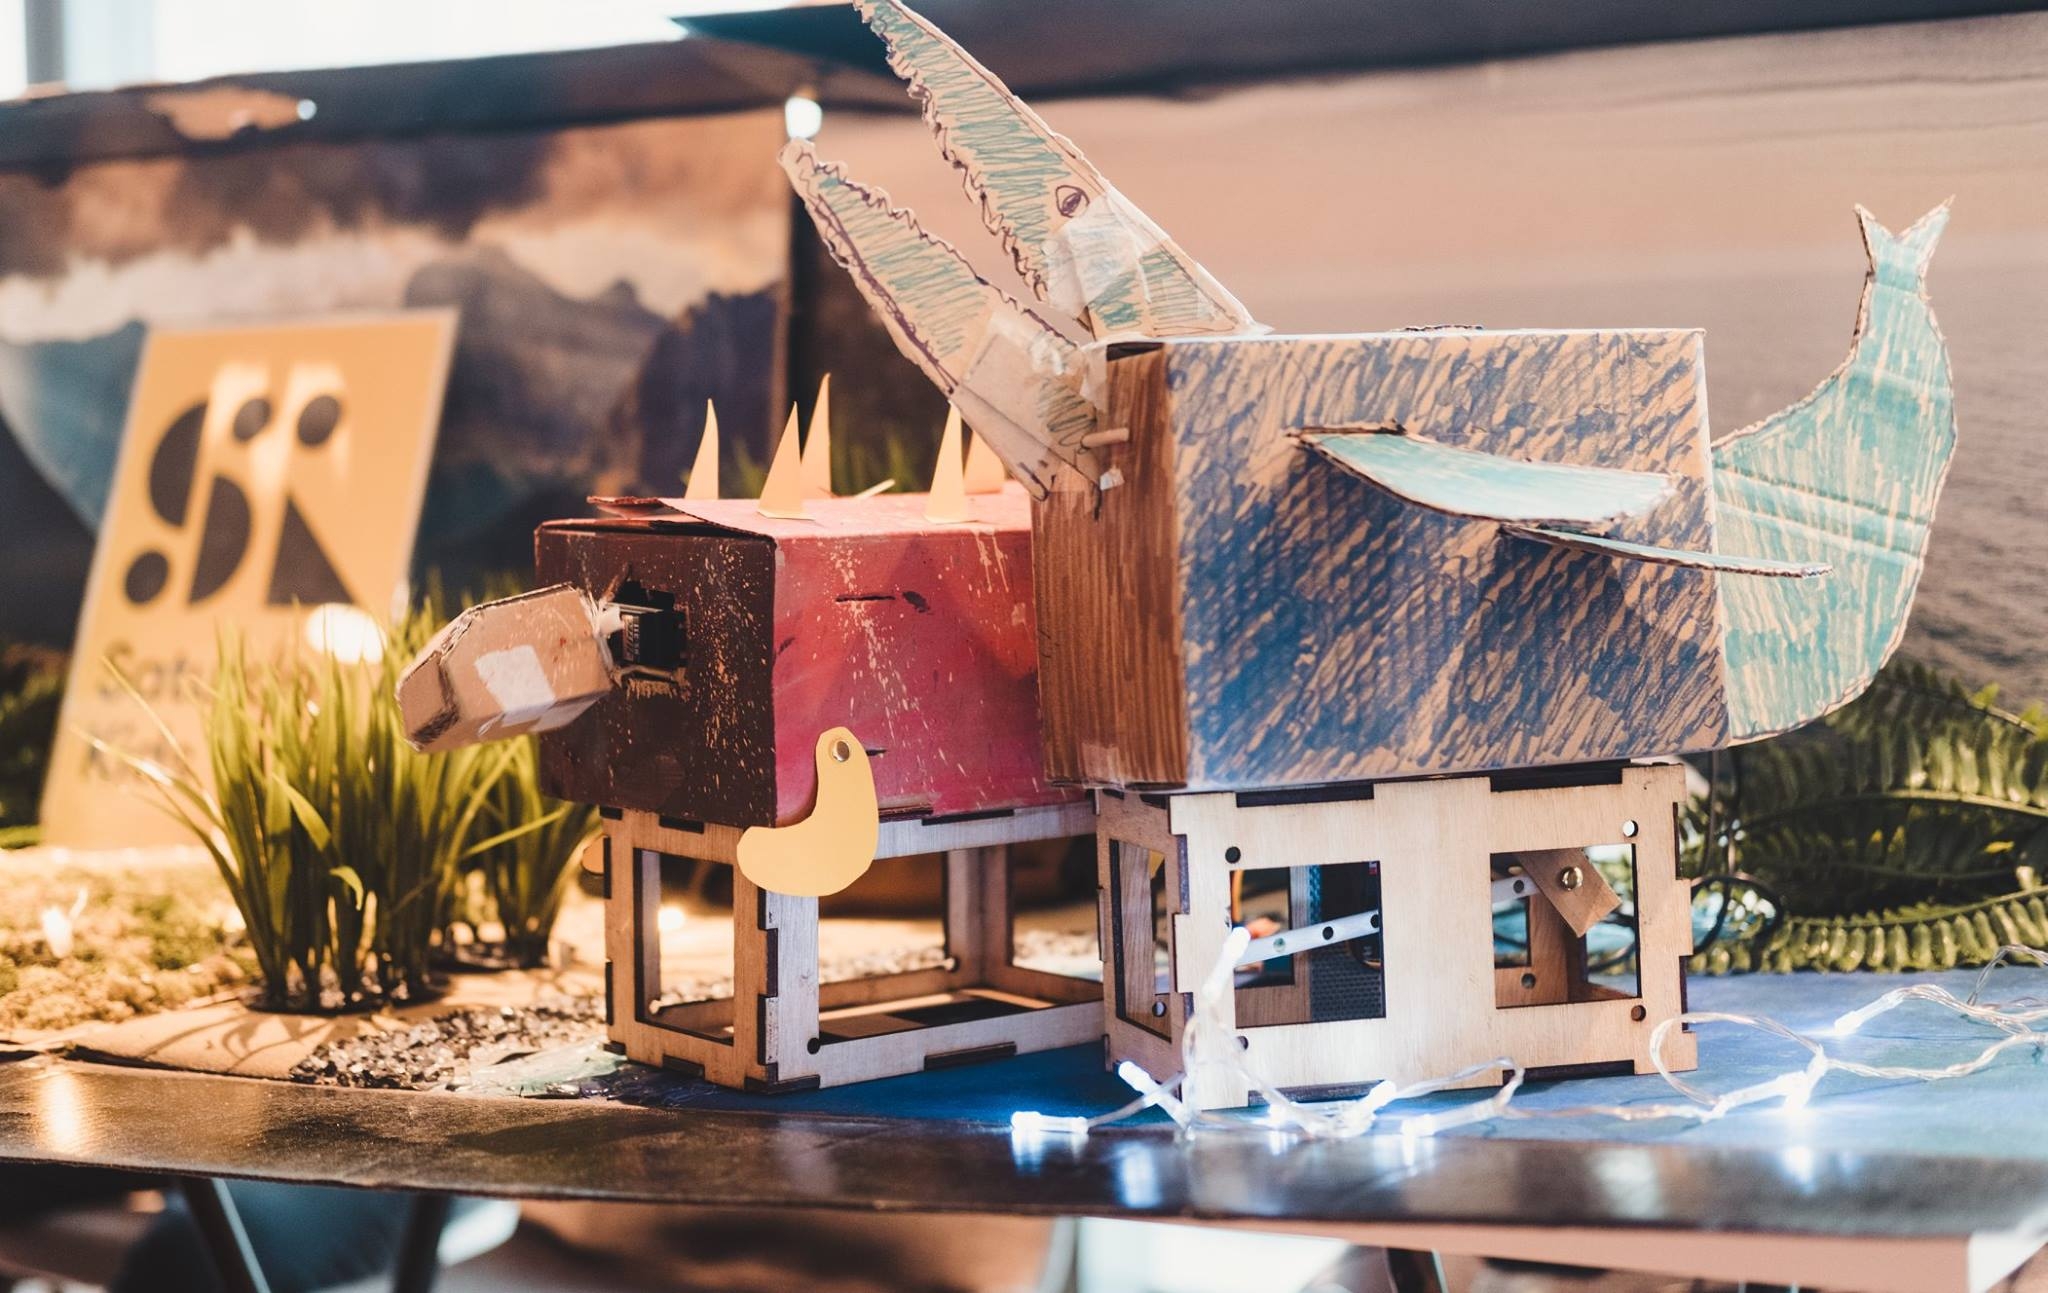
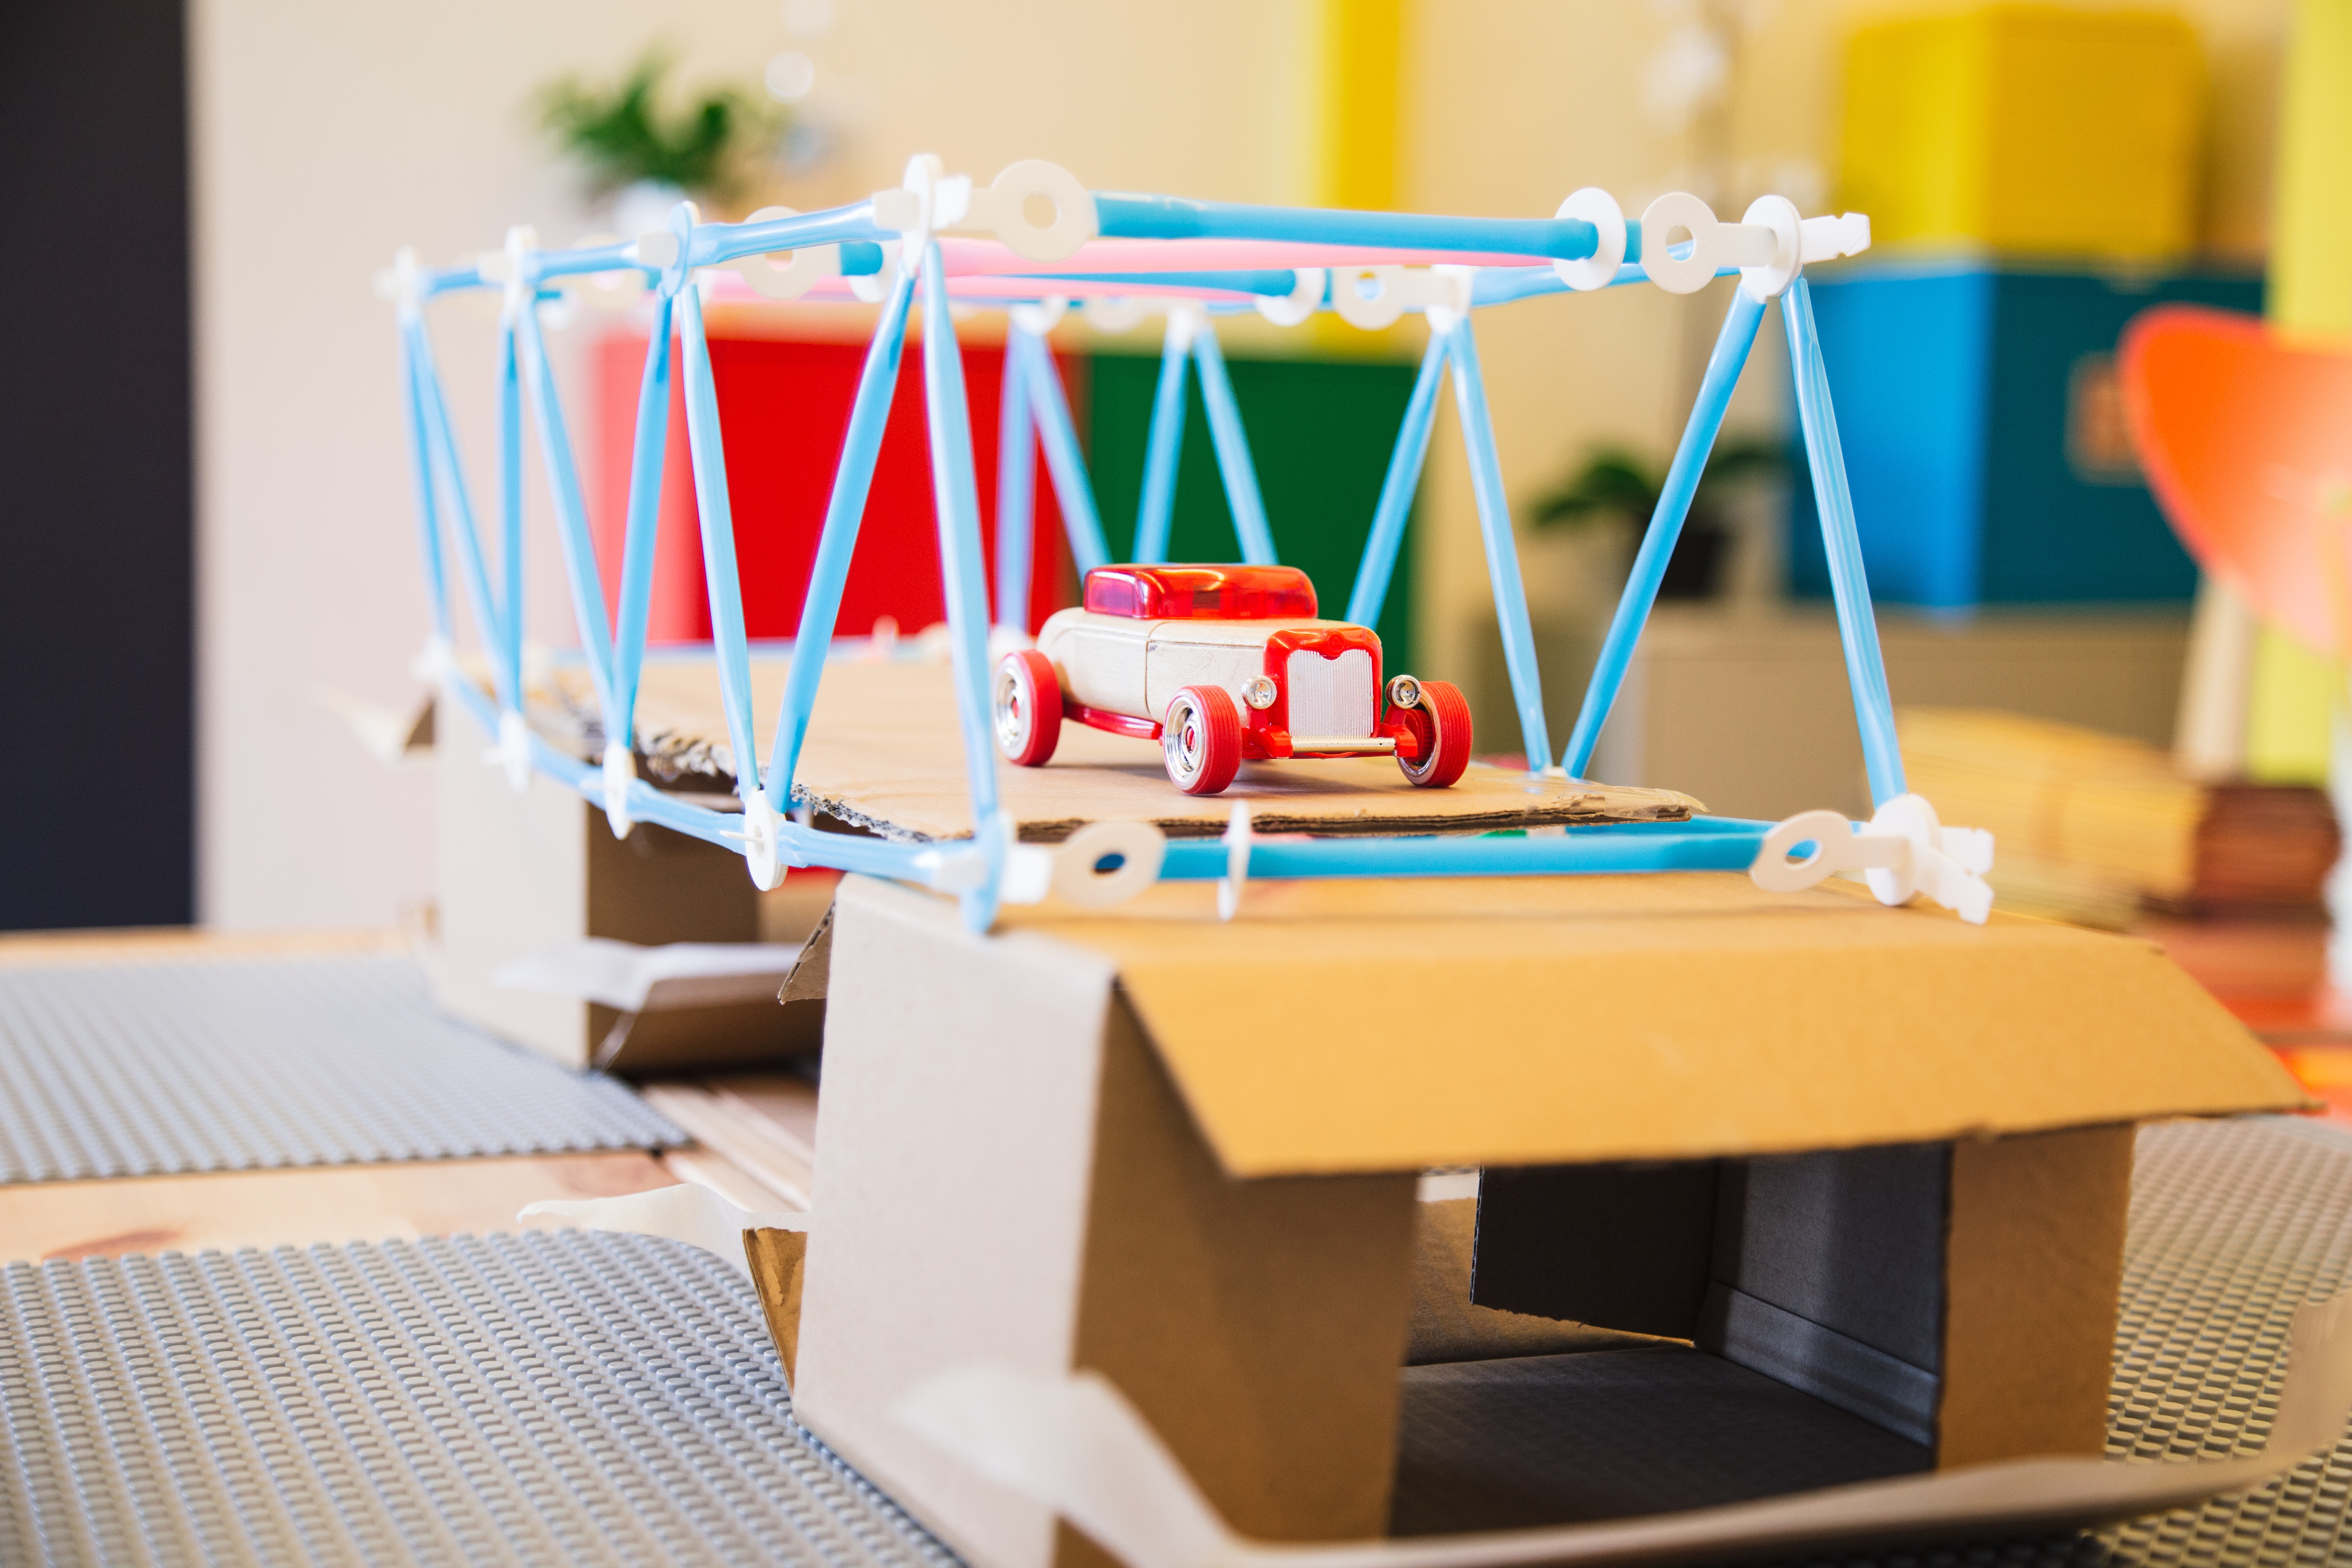
Build amazing inventions like these:
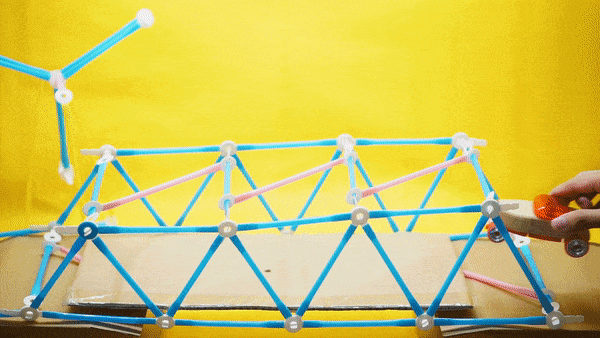
With basically just this:

But how??
Let’s find out. We take you behind the scenes below with Swe & Shawn, our curriculum developers (or Rocket Launchers as we call them) – leading the design of one of our newest courses, Marvelous Machines and Mechanisms.

Swe: It started with the product team playing with and testing out different toys earlier in January. We found that we enjoyed Strawbees a lot. It has a lot of potential…you can teach physics, molecular structure, mechanics. You can build a lot of things with it and there’s a lot of versatility in terms of learning objectives/outcomes. The best part is that it’s so easy!
It really is! Here’s our 3 step guide to building your first Strawbees structure.
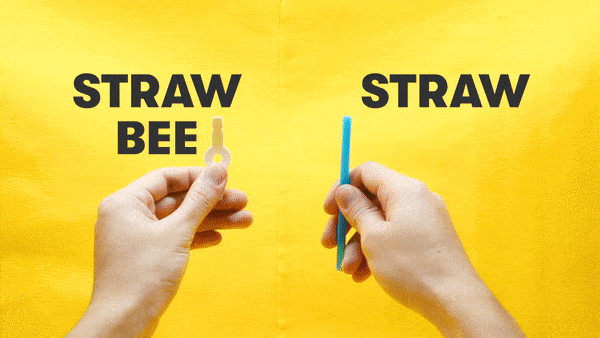
- Grab a straw (any plastic one will do, we use 100% recyclable and reusable straws because duh.), grab a strawbee and join.
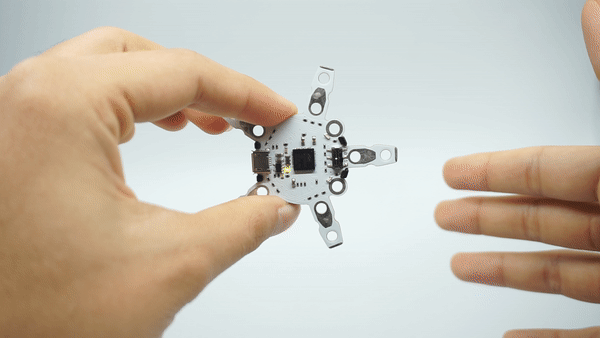
- This is what a Quirkbot looks like. It’s a mini microcontroller board which can be programmed and used with various LEDs, sensors and motors to build a robot.

Use a simple block-based interface similar to Scratch to program your Quirkbot.

- Straws + Strawbees + Quirkbot = Tadaa! Build your own robot
(and program it to take over the world muahaha!)
Swe: It’s really easy to prototype. You can build a model of something interesting like the Art Science Museum even. You just need straws of different lengths, the connectors are all provided in the kit. I’ve found that kids really enjoy the challenge of building something like a catapult and trying to get it working. It gets kids thinking about what they want to build, and trying to figure out how to get there.
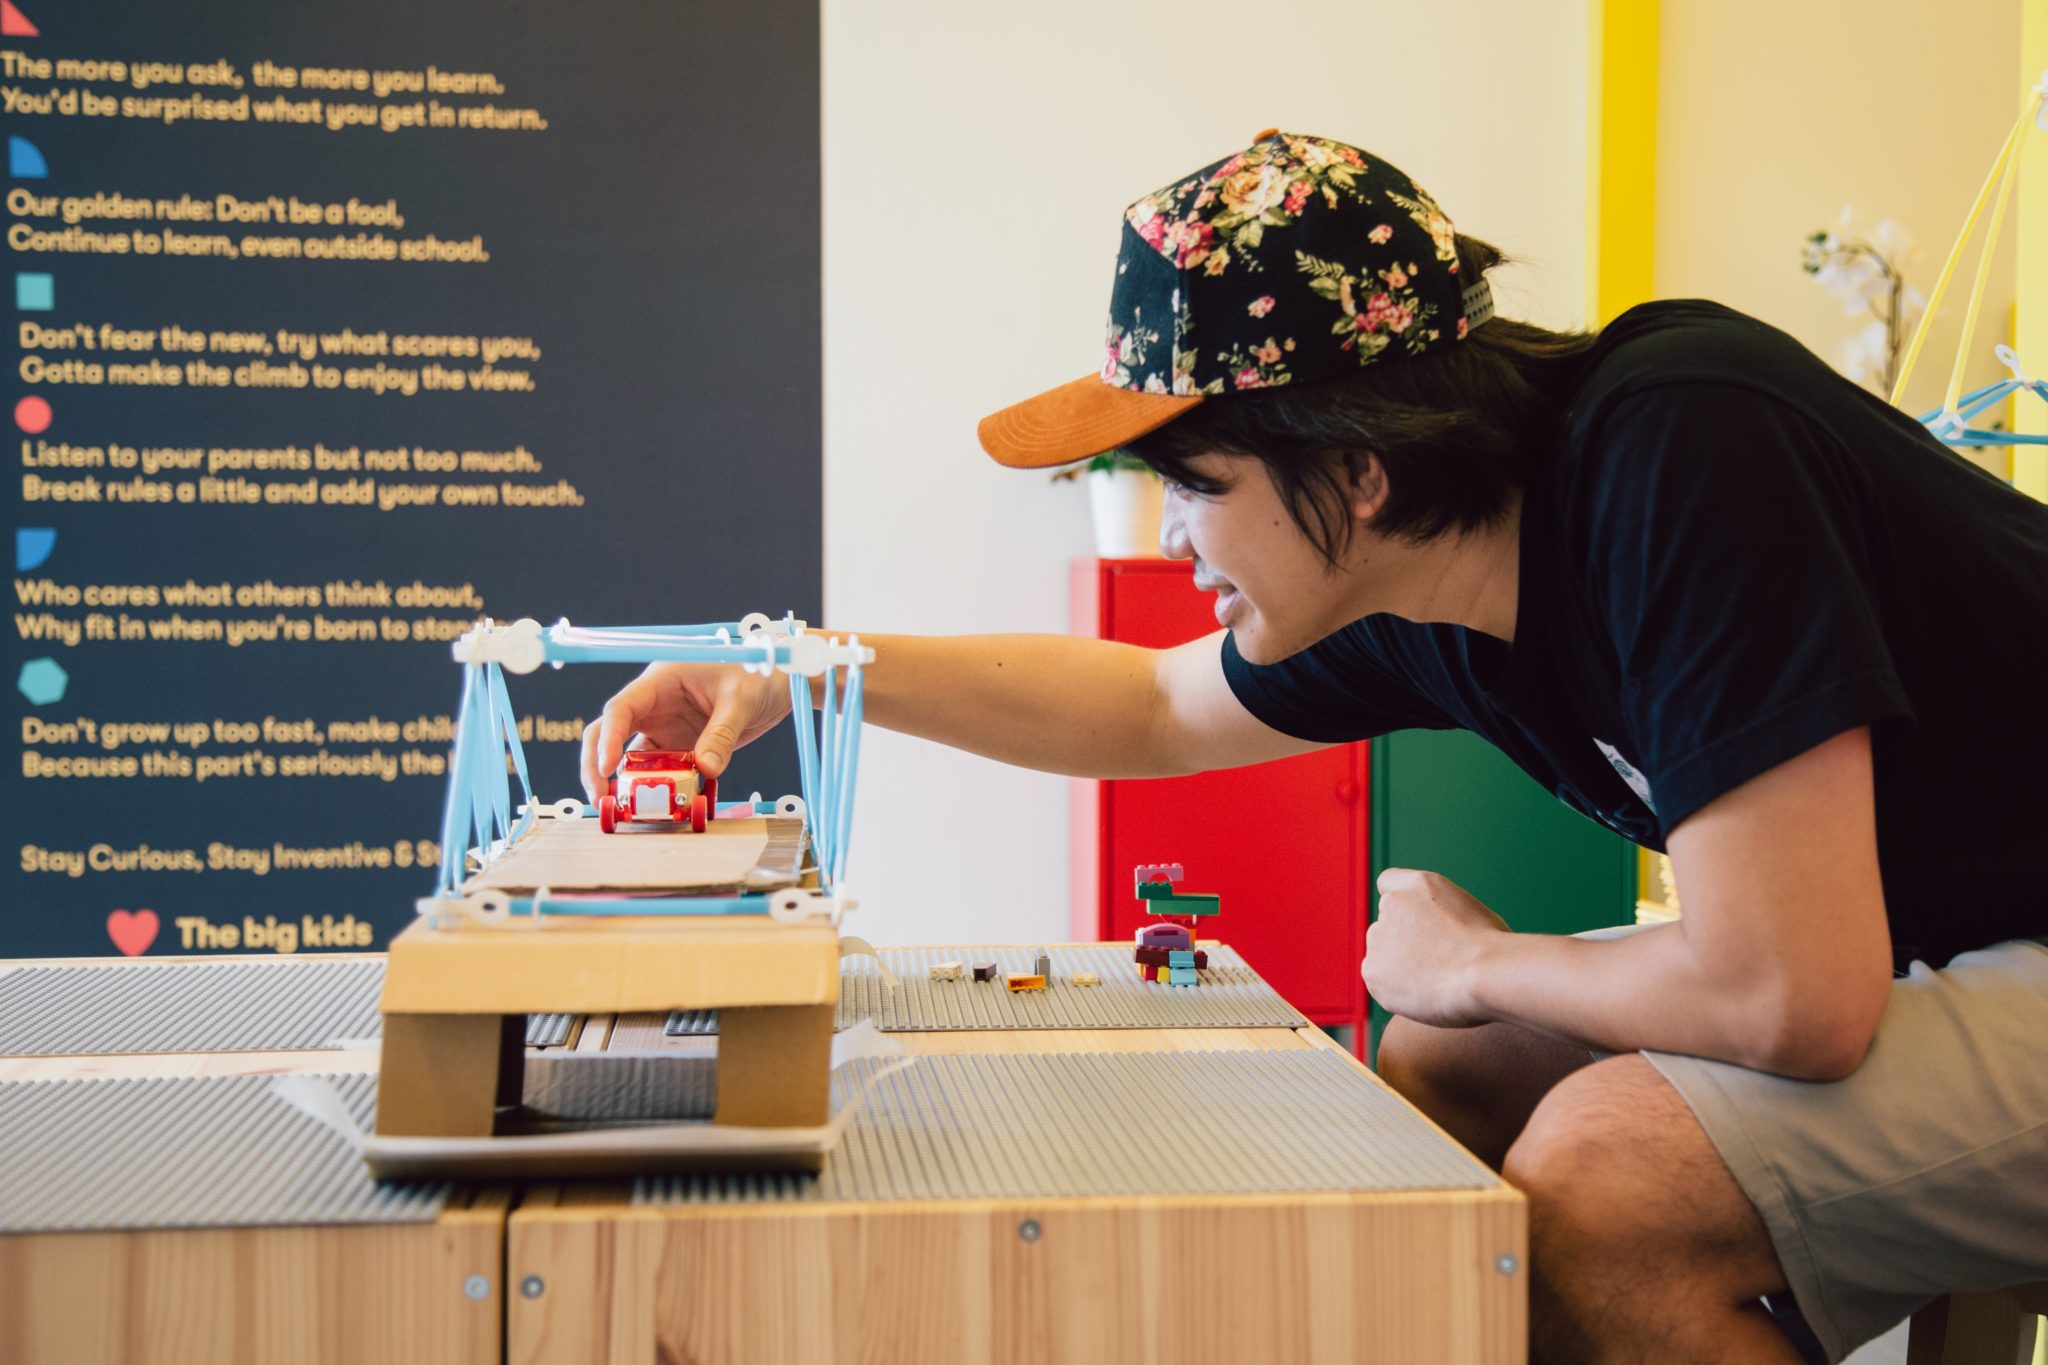
Shawn: A machine is basically a bunch of moving parts put together. It’s about figuring out how each part works and then how to get them working all together. Your Strawbees structure is the same – you start with simple cubes and triangles, you put them all together to create a machine, and then you program the Quirkbot to get the parts to move.
Swe: We cover a bit of structural engineering in this course, and we obviously touch on the programming aspects with servos, input output, LEDs. But it’s essentially a very broad-based introduction to STEAM (Science, Tech, Engineering, Arts, Math).
Shawn: We want kids to be able to apply what they learnt in Scratch to something really fun that challenges their creativity and at the same time, has real-life applications. In this course, their creativity really is the limit.
![]()
Join straws to create 3D shapes, structures like bridges and towers. Learn the engineering concepts that makes a bridge structurally stable and how everyday mechanisms work. Then combine it with the Quirkbot, a tiny computer, to power your mechanisms and your robots!
Please note that this course requires your kid to have completed Start with Scratch: Adventures in Time or have an equivalent block-based programming experience.
*No straws were harmed in the making of this course. All straws used are 100% recyclable and were reused.